I like my patterns to be inclusive, so I try to offer them with both written and charted instructions. However, sometimes (like the Mahy shawl) a chart is the best way of offering concise and precise information. I know many people don’t like charts, but I hope this series of tutorials will go some way to demystify charts and explain how to use them. This instalment is all about my favourite lace chart hacks. I like to knit lace wherever I go (my favourite being pub knitting) and over the years I've picked some some tricks that I hope will come in useful. If this is the first post in the series, I suggest you go back and start with Tutorial 1, as I'll be discussing some of the things we've covered earlier.
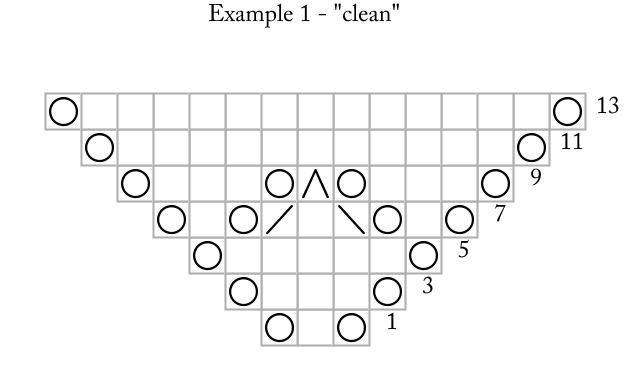
Let's look at a shawl chart which has a repeat.

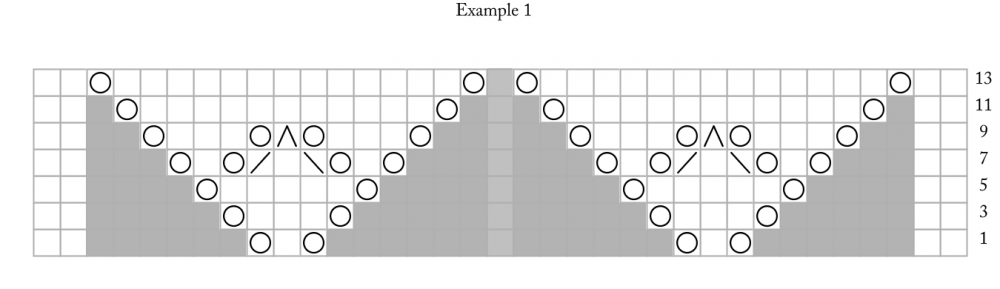
By now this should not look too daunting. You have the row numbers, you know what comes after the centre stitch and this should knit up fine on first repeat, yes? But what if you have to work this chart 10 times? How would you feel about it then?
Problem 1: "I find working repeats really difficult. I never have the right number of stitches at the end of a row".
I hear you. Let's look at it closer.
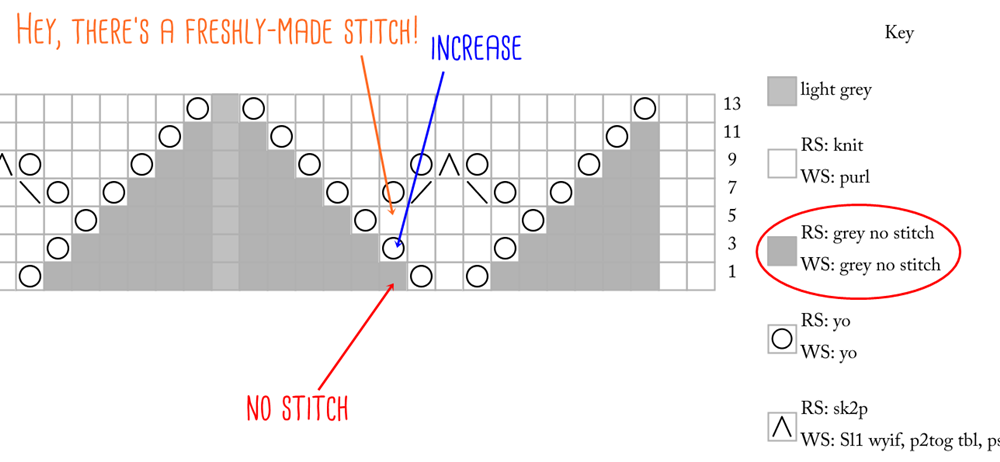
Part of the problem is that you may think each square represents a stitch - so you should have three stitches left at the end of row 1. As we discussed previously, thinking of a square as a stitch is wrong. Remember: each square represents an action - in this case you are asked to work a yarn-over, an ssk and a yarn-over before you work the centre stitch. In fact, that means, you only have two stitches left over when you finish your repeat because you create yarn-overs out of thin air (so to speak) - the two stitches from which you make an ssk.
Solution 1a: look at the chart to see how many actual stitches you should be left with at the end of working all the pattern repeats.
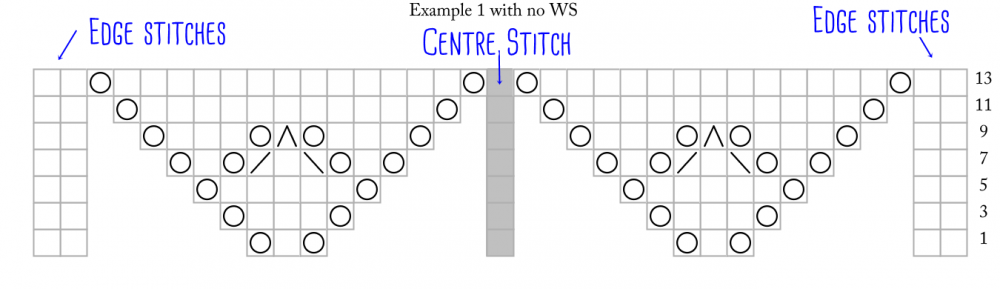
Another possible explanation may be that you forget you are supposed to have edge stitches left at the end of the row. So, instead of having the supposed two stitches when you finish the chart, you may have four stitches.
Solution 1b: remember you have edge stitches left at the end of the row. Place stitch markers to indicate when you start/finish working the edge stitches.
Problem 2: "I find working repeats really hard. I tend to get lost and never know where I am!"
Solution 2a: Stitch markers are your friends. Place them to outline each repeat. Sometimes you need to be careful as stitch markers may shift slightly (especially if repeats begin or end with yarn-overs). However, as long as you are vigilant, stitch markers are your best friends.
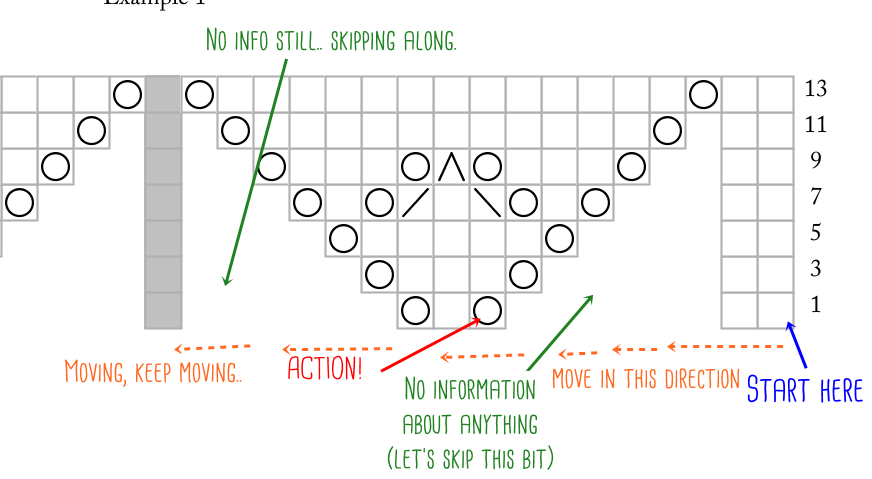
Solution 2b: Don't forget to count! Look at the chart - the repeat is worked over 10 stitches, so keep that number in your head as you work. Keep working in batches of 10 stitches, so you always start at the beginning of the repeat whenever you pick up your knitting.
Solution 2c: This is an extension of Solution 2b, but it's my favourite hack. Think of repeats as clusters of actions. You need to execute ten actions - that is one cluster. This is where lace knitting gets almost meditative: just work these ten actions over and over (or however many actions your chart calls for). Imagine if everything in life was as simple as working these ten actions over and over. Ah, sink into those clusters... you may even be able to break that 10-action cluster into even smaller clusters - on Row 7, for instance, you knit 3 stitches, work a yarn-over, then an sk2p, and a yarn-over, followed by four knit stitches. In my head I'd translate that into two clusters: "knit 7 cluster, work action cluster" - and I'd remember I'd need to end with two stitches at the end - at which point I'd do a yarn-over, an ssk, and a yarnover.
Now. There is something I hear again and again:
Problem 3: "When I use a chart, I get lost in the symbols and I lose my place immediately."
This is where stationery comes in handy. Allow me to demonstrate using a very familiar chart.
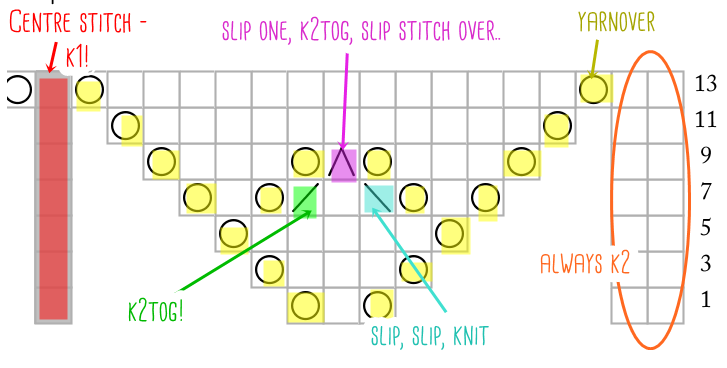
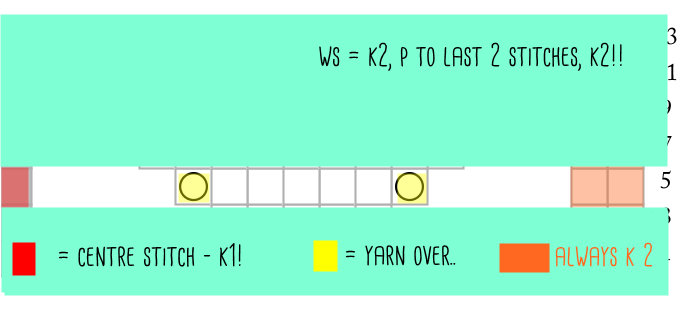
Solution 3a: grab your highlighters and assign a colour to each symbol (you may want to photocopy your chart if you are working from a book). Some people just find chart symbols really confusing and respond a lot better to colours. You'd be amazed what a difference it makes to some people - give it a go as you may be one!
Solution 3b: Grab some big post-it notes. Place them above and below the row you are currently working on. Scribble extensive notes on the post-it notes. This filters out all unnecessary information and leaves you to focus.
Solution 3c: And don't forget to tick off rows as you've worked them!
Problem 4: "I am afraid of making mistakes and then having to rip out my knitting because lace is really hard to pick back up!"
Don't worry, everybody makes mistakes. Fortunately fixing your knitting is much, much easier to do than you think. I like to think as lace knitting as almost-free therapy: I cannot fix everything in my life, but I can fix my knitting in a matter of minutes! Also, please don't think of mistakes as bad things - I love making mistakes because I know it makes me a better knitter!
Solution 4a: if you've missed a yarn-over in the row below, don't pull out the entire row. This is a great YT video by Paula of the Knitting Pipeline podcast that shows you how to fix it easily.
Solution 4b: Lifelines are great. Once you've finished a successful repeat of a chart (say, the set-up chart), insert a lifeline so you know you can rip back to this sweet spot where everything's right. If you make a mistakes the stitches will stop falling at this stage, you can pick up all the stitches and get back to knitting. You are working a particularly complex chart, you may want to insert a lifeline a bit more often - just make sure you know where you've inserted the lifeline and don't confuse yourself with having fifteen lifelines in one shawl. Keep it simple! This is a really useful YT video showing just how to insert a lifeline and how to use it.
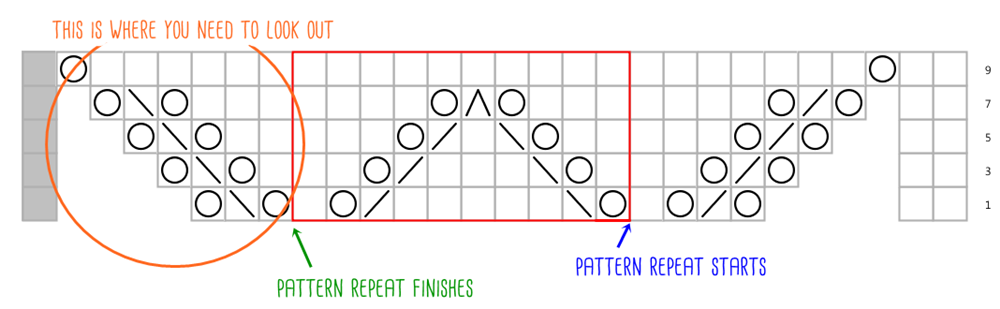
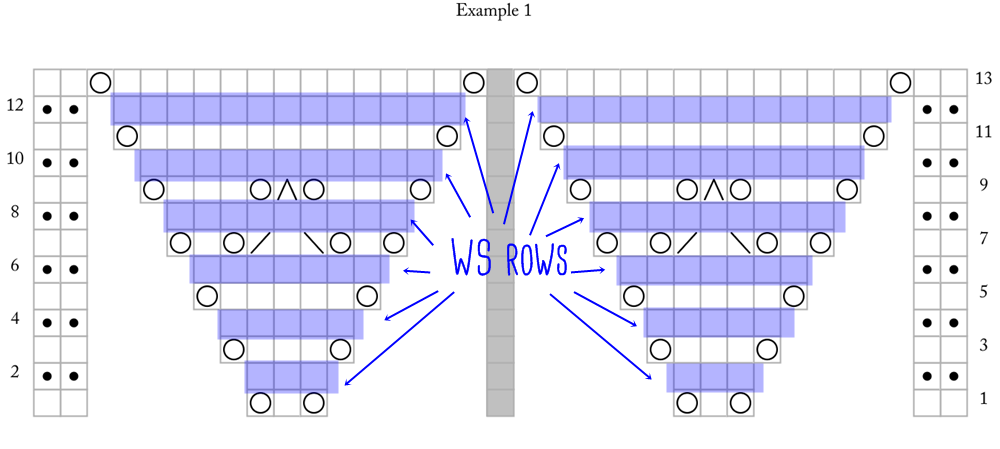
One of the best hacks I know is to take some dental floss and insert it into the tiny hole on my interchangeable needle - that way I can insert a lifeline as I am knitting. This is particularly useful if there's a RS row in the pattern where it's all knitting with no stitch pattern (like Row 9 of the Shawl Chart with Repeat I showed you earlier).
Problem 5: "Charts are really small and I have trouble telling the symbols apart. It takes all the fun out of knitting if I have to keep staring at tiny squares!"
I am a low-tech girl and yet I find modern technology really helps me out here.
Solution 5a: If you are knitting from a PDF, your device of choice can zoom in and out. Consult your manual to see how it's done as it differs from device to device.
Solution 5b: if you are working from a printed book or magazine, you can enlarge the chart using a photo copier (many modern printers come with a scanner/copier that will let you do it from the comfort of your own home - otherwise you can do it at the library or ask at work if it's okay to enlarge a chart using the office equipment). By enlarging the chart you can also really go to town with highlighters and scribbled notes!
I hope you've enjoyed this four-part series of lace chart tutorials.
Lace Charts 1 – The Anatomy of a Lace Chart Lace Charts 2 – How to Read a Basic Chart Lace Charts 3 – How to Read a Shawl Chart Lace Charts 4 - Chart Tricks & Knitting Hacks
Thank you! Kx
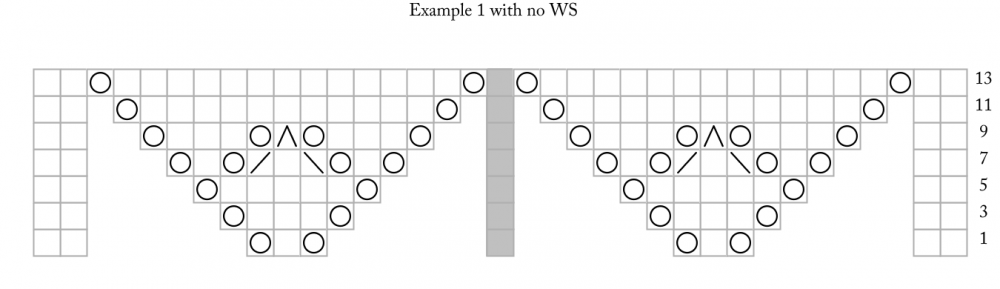
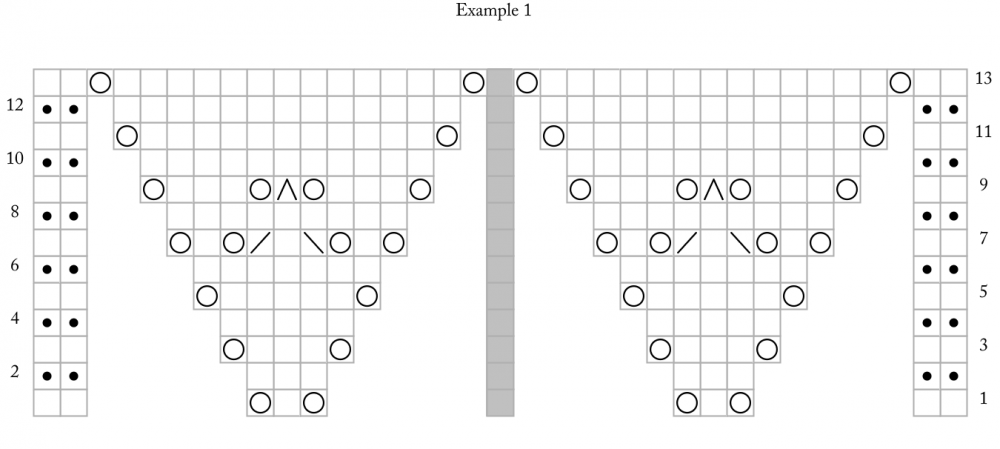
 The chart has you repeating the same stitch patterns after the centre stitch (I will be writing more about this in a later instalment. Note that I am talking about actions in the image- in the next part I will share how you read a lace chart and we'll talk more about actions then).