
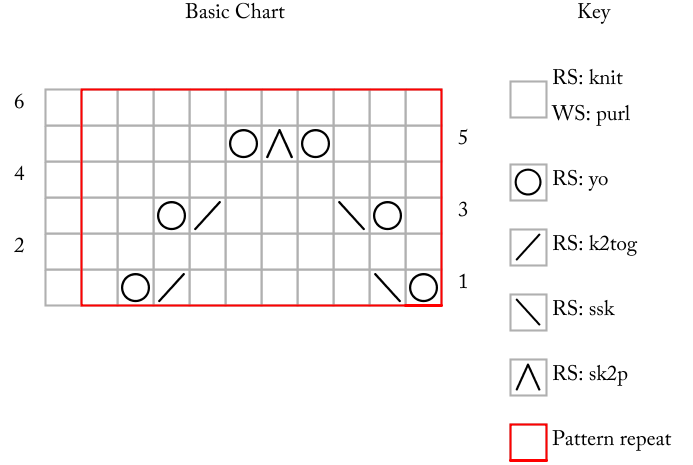
I like my patterns to be inclusive, so I try to offer them with both written and charted instructions. However, sometimes (like the Mahy shawl) a chart is the best way of offering concise and precise information. I know many people don’t like charts, but I hope this series of tutorials will go some way to demystify charts and explain how to use them. So, we've had a look at the anatomy of a lace chart and how to read a basic chart. Today I'll take a look at a slightly more complex chart that adds extra stitches as well as mysterious "no stitches".
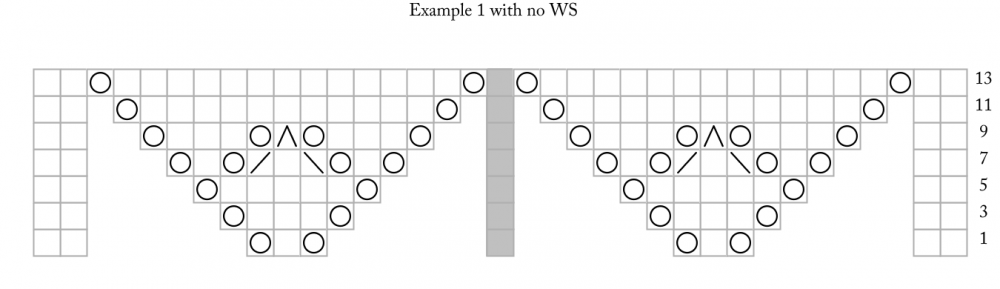
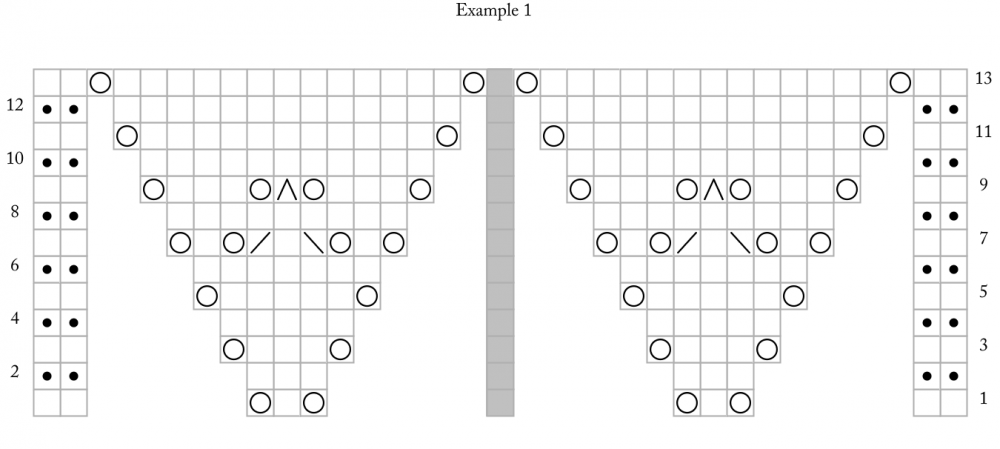
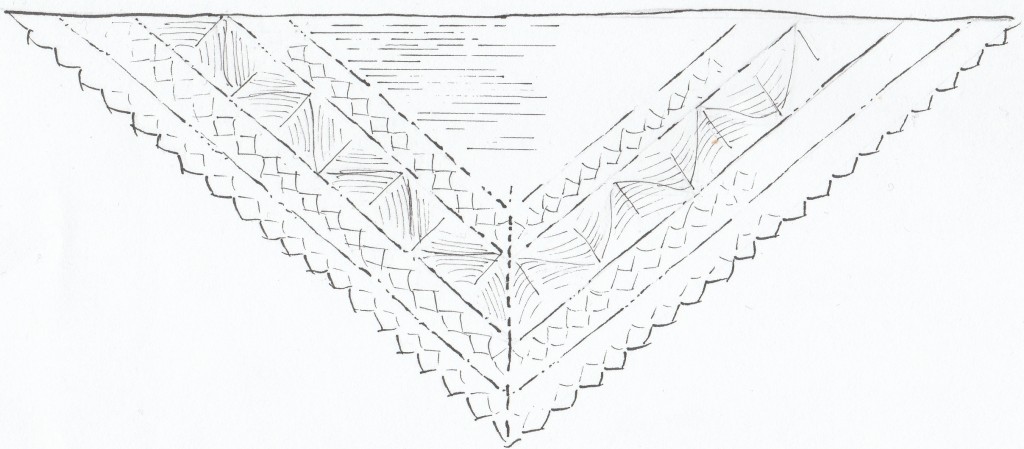
We had a look at this in the first tutorial. But there was one thing I left out that you may or may not have seen in charts: "No Stitch" symbols. 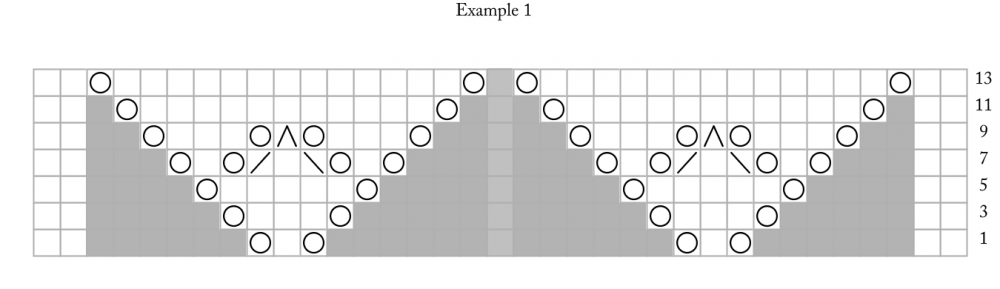
The "No Stitch" symbol is inserted because charts are essentially a 2D grid of a 3D object. Because we make stitches in that position later on, we need the grid to reflect that. To wit:
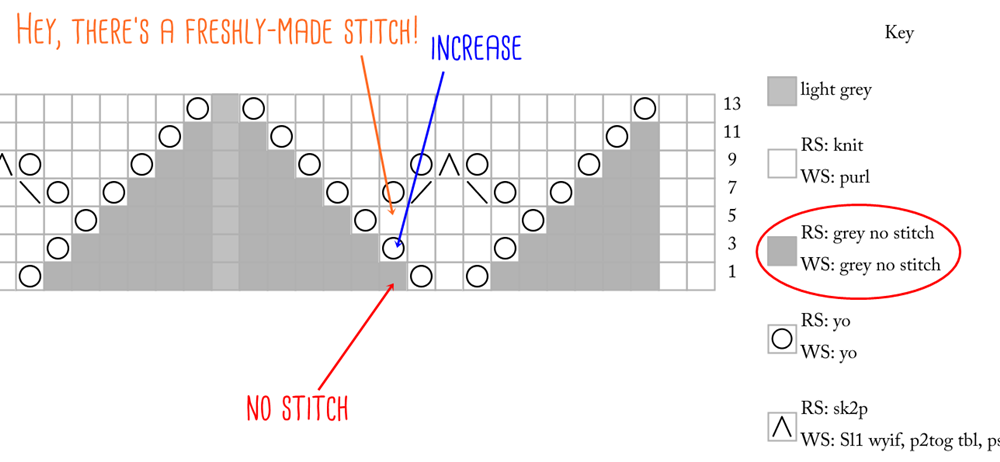
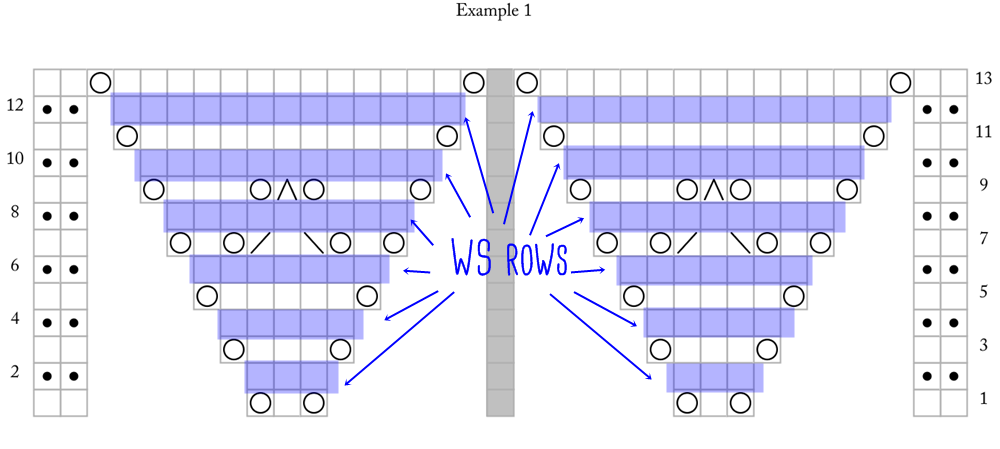
I like to hide "No Stitch" squares in my chart because I find they cause more confusion than they are worth. As a knitter, all you need to know is that these "No Stitch" squares are actions that do not exist yet. Skip them. You are yet to make them.
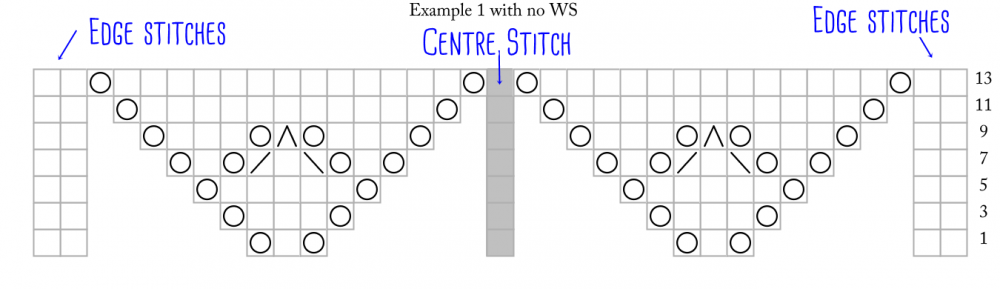
So, let's go back to the lace chart where the "No Stitch" squares have all vanished into thin air. Let's figure out how to follow this one.
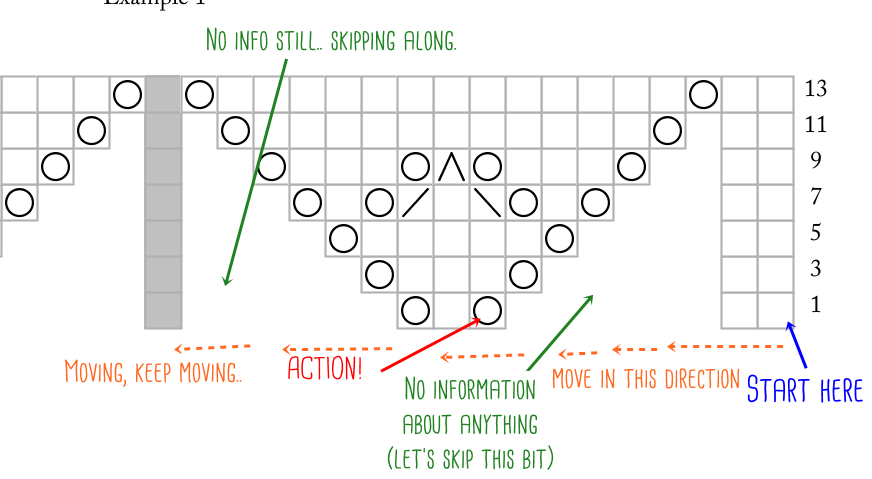
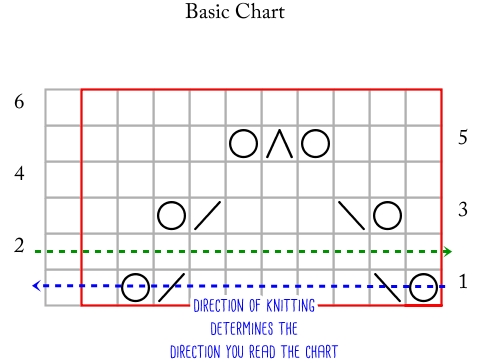
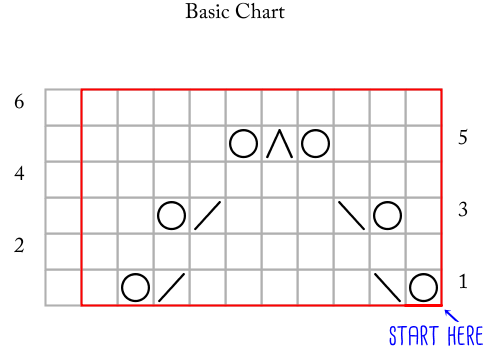
Step 1: Look for the row number. You start with Row 1. Step 2: Work in the direction you are working the stitches. On RS rows, work from right to left. On WS rows, work from left to right. Step 3: Each square represents an action you must take. Mostly you end up with a single stitch on your needle as the result of your action, but keep checking your chart key for information! Step 4: If you cannot see a square or if the square is indication as "No Stitch", you skip to the next action you can see. Step 5: If information isn't visible (i.e. you cannot see WS rows on the chart), check the pattern for instructions.
Keeping all this in mind, you might start looking at the chart like this:
This post is part of my Lace Chart tutorial series:
Lace Charts 1 – The Anatomy of a Lace Chart Lace Charts 2 – How to Read a Basic Chart Lace Charts 3 - How to Read a Shawl Chart Lace Charts 4: Chart Tricks & Knitting Hacks
Next time we will look at chart comprehension hacks and how to customise your charts. That will be the last chapter, so keep your questions coming either here or via social media. Kx
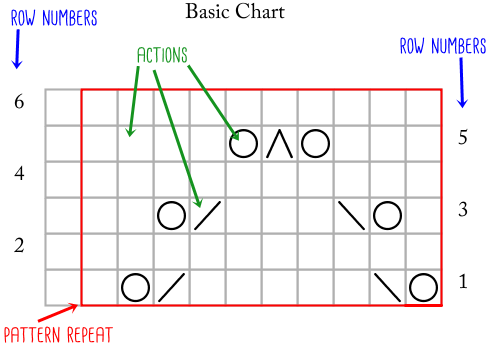
 The chart has you repeating the same stitch patterns after the centre stitch (I will be writing more about this in a later instalment. Note that I am talking about actions in the image- in the next part I will share how you read a lace chart and we'll talk more about actions then).
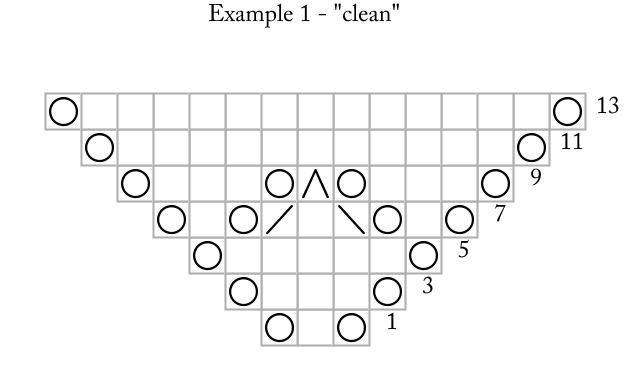

 The Mahy shawl is the second instalment in the Authors & Artists series. It is a traditional hap shawl knitted in
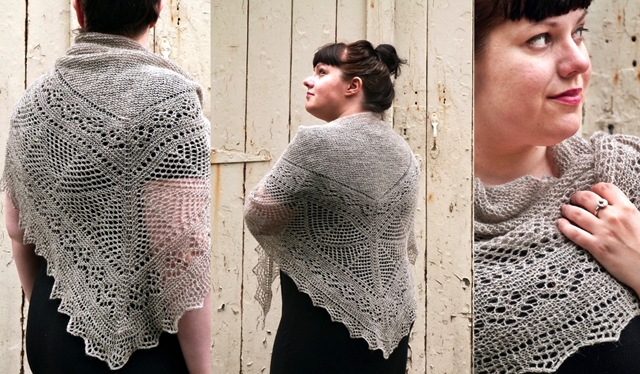
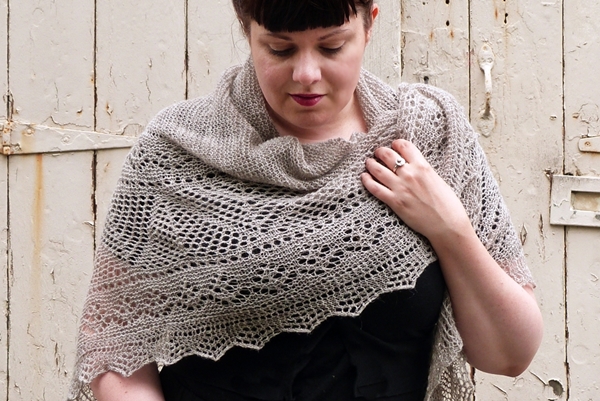
 The weather gods were in our favour. We finally have proper photos of the Mahy shawl. I'll write about the inspiration behind the shawl in the next blog post, but first I wanted to talk yarn.
Mahy was knitted using roughly 770 yards of
The weather gods were in our favour. We finally have proper photos of the Mahy shawl. I'll write about the inspiration behind the shawl in the next blog post, but first I wanted to talk yarn.
Mahy was knitted using roughly 770 yards of 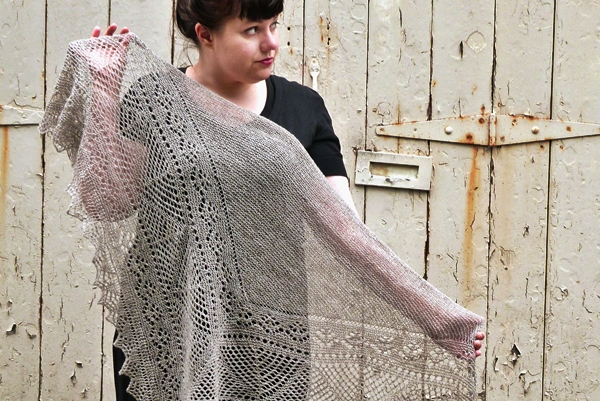
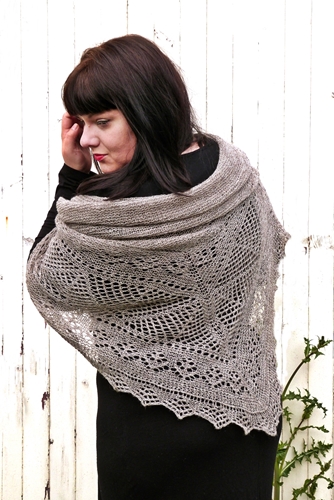 Another photo shoot beckons. I am a perfectionist and I haven't been happy with the photos we've managed to get so far. The first shoot was basically us trying out a couple of locations. Obviously the first location we tried turned out to be my favourite - isn't it always so? - but we had only shot a couple of photos. I wanted more.
So, yesterday we headed out for another shoot. I was tired and I think it showed in the images.
Another photo shoot beckons. I am a perfectionist and I haven't been happy with the photos we've managed to get so far. The first shoot was basically us trying out a couple of locations. Obviously the first location we tried turned out to be my favourite - isn't it always so? - but we had only shot a couple of photos. I wanted more.
So, yesterday we headed out for another shoot. I was tired and I think it showed in the images.