Ten Years

dave10

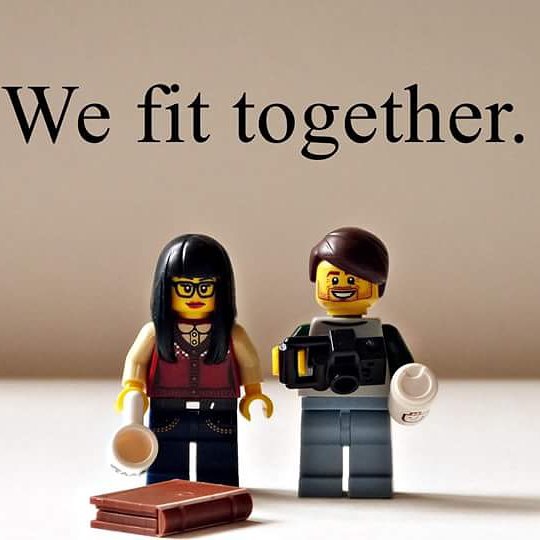
Lego figures built by David Fraser who also took the photo.

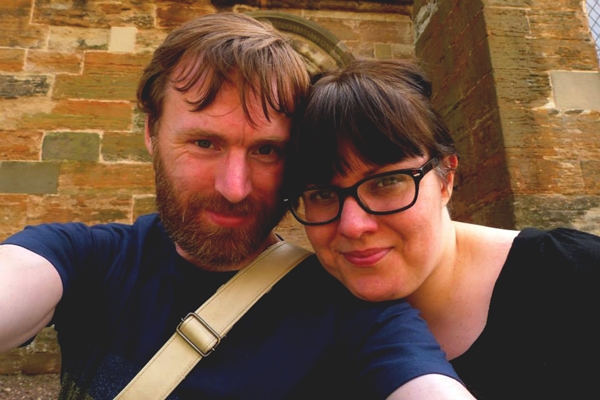
Ten years ago a Scottish boy told a Danish girl that he really liked her. The Danish girl went: "Oh shoot, I like you too, but I don't want to ruin our friendship because.." (cue five-minute ramble). The Scottish boy assured the girl that the friendship wouldn't suffer. Ten years later they are still each other's best friend as well as still really liking each other.

I met David online. He had a blog and I had a blog (an earlier incarnation of this one!). True to the era we had no idea what the other person looked like, but we liked the same things (1990s indie pop, art, camp musicals, and books). We were online friends for about four years before we realised we really liked each other's company. We had grown closer over the four years to the point where I considered him one of my best friends. And then he threw that bombshell.

It's difficult to imagine what my life would look like without Dave. I used to say I'd die a spinster underneath a collapsed pile of books - but now I not only know the etymology of the word 'spinster' (someone who spins yarn!) but I also get to talk about yarn, etymology and books for a living. I live in one of the most beautiful cities in one of the most beautiful countries in the world. And I have a life where conversations over dinner revolve around colour theory, art movements, and Star Wars Lego. We have impromptu dance sessions in the kitchen. He takes photos. I knit. We eat cake and discuss politics.

Dave is my rock (and photographer, stylist, sounding board, and biggest cheerleader). Things have not always been easy, but they have been worth it.

Happy ten years to the cool, funny, warm-hearted guy who makes me want to be the best person I can possibly be. Thank you for opening up your life to me. I still really like you too x

(And because I can - here's a Spotify playlist of music we've danced to over the last decade.)

davekarina

Two Events!

July 2015 217 I am currently putting last touches to my workshop schedule for late 2015/early 2016. I am sitting on my hands a little bit as some of the events are not mine to announce, but I can give you the heads up on two of the several one-offs I will be doing.

August 26-28, 2015: In the Loop 4 - From Craft to Couture. This is an academic conference held in Glasgow at which I am giving a paper on the semiotics of knitting with special reference to The Killing. Other speakers include luminaries such as Annemor Sundbø, Lynn Abrams, Jennie Atkinson, Tom Van Deijen, Roslyn Chapman, and Linda Newington. I am so honoured to be involved.

February 27-28, 2016: Joeli's Kitchen Retreat, Manchester. This promises to be so much fun. I'm running classes alongside Kate Atherley, Jules Billings and Joeli herself. Some very special guests are going to be there alongside exclusive vendors. ETA: Joeli's down to just eight four slots, folks!

Aside from one-off events I'll be teaching at various yarn shops as well (old and new friends alike!) and I'll be posting the schedule as soon as we have worked out all the details. Last year got a bit crazy (along the lines of "if this is Wednesday, this must be Belgium") so this year I have included some downtime into my schedule, so I can a) sleep, b) spend time with my loved ones, and c) design!

July 2015 205

The Vintage Shetland Project: Stories & Stitches

VS

sc

It was an early morning in March 2013 that I first heard Susan Crawford talk about her Vintage Shetland project. We were at the inaugural Edinburgh Yarn Festival catching our breaths over a morning brew before the doors opened. And then Susan started sharing her ideas and I forgot all about my cuppa. The idea was stunning: Susan was doing research into Shetland knitting, but she was not just researching a much-loved knitting tradition but she was doing so using her background in fashion history. Could a tradition such as Shetland encompass fashion history? Of course it could, Susan argued, and she wanted to write a book about Shetland knitting and fashion-as-social-history. 

Over the next few years I saw Susan work hard on the book. Working in the Shetland Museum and Archives, she whittled down the pieces she wanted to write about - not only did they need to be unique and beautiful, but they also needed to contain multi-layered stories. The items had to tell stories about Shetland, about the people who live there, and about the vagaries of the Shetland knitwear industry. They also had to reflect larger trends within the early 20th century. Shetland knitting is a complex tapestry of interwoven stories, and Susan knew her selection had to be right. In the end she decided upon 25 pieces that she wanted to analyse in-depth and recreate. Some of the pieces proved to be technical headaches - I will come back to one of these - whilst others prompted Susan and her husband Gavin to launch a new yarn line simply so the garments could be reknitted in the 21st century to the right gauge and colours.

cardigan-horz

Fast forward to 2015 and Susan has now launched a crow-funding venture via Pubslush. The initial goal of £12,000 was reached within a few days, but it is heartening to see how people keep wanting to support Susan's book. Anything above the goal will be spent on extra material for the book, help Susan with the cost of hiring extra hands, and take some of the pressure of the publishing process. I have been seeing much of this process up-close and it really does carry an enormous amount of pressure and stress. And I cannot help but be so proud of Susan for imagining this whole project into being and doing so with so much care. It goes without saying that Vintage Shetland backers are richly rewarded: from yarn rewards and ebooks to exceptional experiences like taking a tour of the Shetland Textile Collections with Susan or taking a special workshop at Susan and Gavin's farm.

I have my personal favourites, of course. A stunning late 1920s/early 1930s jumper knitted in natural shades with incredible geometric stitch patterns. A hugely wearable cardigan from late 1940s/early 1950s with bands of light blue and red motifs (you can see it on the left in my little photo montage - who wouldn't want that in their wardrobe?). A fabulous 1920s tunic/crossover jumper which is just so heart-achingly on-point. And then there's this beret which is deeply intriguing.

swirlhat-horz

I saw an early sample of this hat at the Crawford farm last year. The construction is quite hard to figure out and I spent ages discussing it with Susan (before she let me have a closer look at the hat!): was it some sort of strange intarsia technique? Was it constructed sideways and worked with short rows? What was going on? It turns out the strips of colourwork were re-purposed from another project of sorts (maybe swatches that the knitter couldn't bear to leave unused or maybe surplus strips knitted to line a buttonband? Maybe strips cut from a too-large project? I will let Susan tell you the actual story!) and then re-assembled to make a beret using scraps of yarns - evident if you look at how the crown shaping works. The beret looks quite straightforward at a glance, but it is one of the most technical pieces in the book. I know it was tricky getting the various gauges right between the colourwork bands worked in one direction and the 'joining' stocking stitch worked in another direction. This is what I love about knitting - it is both so straightforward and complex.

Please do check out the other participants in the blog tour - you can find details below. There are so many ways to approach Susan's project - from vintage lovers and Shetland experts to people who just love the stories Susan will be telling (like me!). I have enjoyed reading every single entry in this blog tour. This project has really captured people's imaginations.

Please also keep up with Susan via her blog which is always a great read. I also recommend you listen to her interview with Jo of Shiny Bees - it is a fantastic interview that really showcases Susan's passion for knitting history and fashion. And do support the Vintage Shetland project if you possibly can.

Thursday 9

th

July

KnitBritish

Saturday 12

th

July

By Gum By Golly

Monday 13

th

July

Hazel Tindall

Wednesday 15

th

July         

Ella Gordon

Friday 17

th

July

Jess James

Saturday 18

th

July

Jen Arnall-Culliford

Sunday 19

th

July

Maja Karlson

Monday 20

th

July

Karie Westermann

Tuesday 21

st

July

Rachel Atkinson

Wednesday 22

nd

July

Woolly Wormhead

Friday 24

th

July

Deb Robson

Saturday 25

th

July

Julia Billings

Sunday 26

th

July

Helene Magnusson

Monday 27

th

July

Tom Van Deijnen

Wednesday 29

th

July

Kate Atherley

Friday 31

st

July

Jamieson & Smith

Sunday 2

nd

August

Donna Druchunas

Monday 3

rd

August

Felix Ford

 aka

knitsonik

Tuesday 4

th

August

TBC

Wednesday 5

th

Aug

TBC

Thursday 6

th

August

Donna Smith

Friday 7

th

August

Susan Crawford

All images copyright Susan Crawford and used with permission. 

Sizing Tips for the Scollay Cardigan

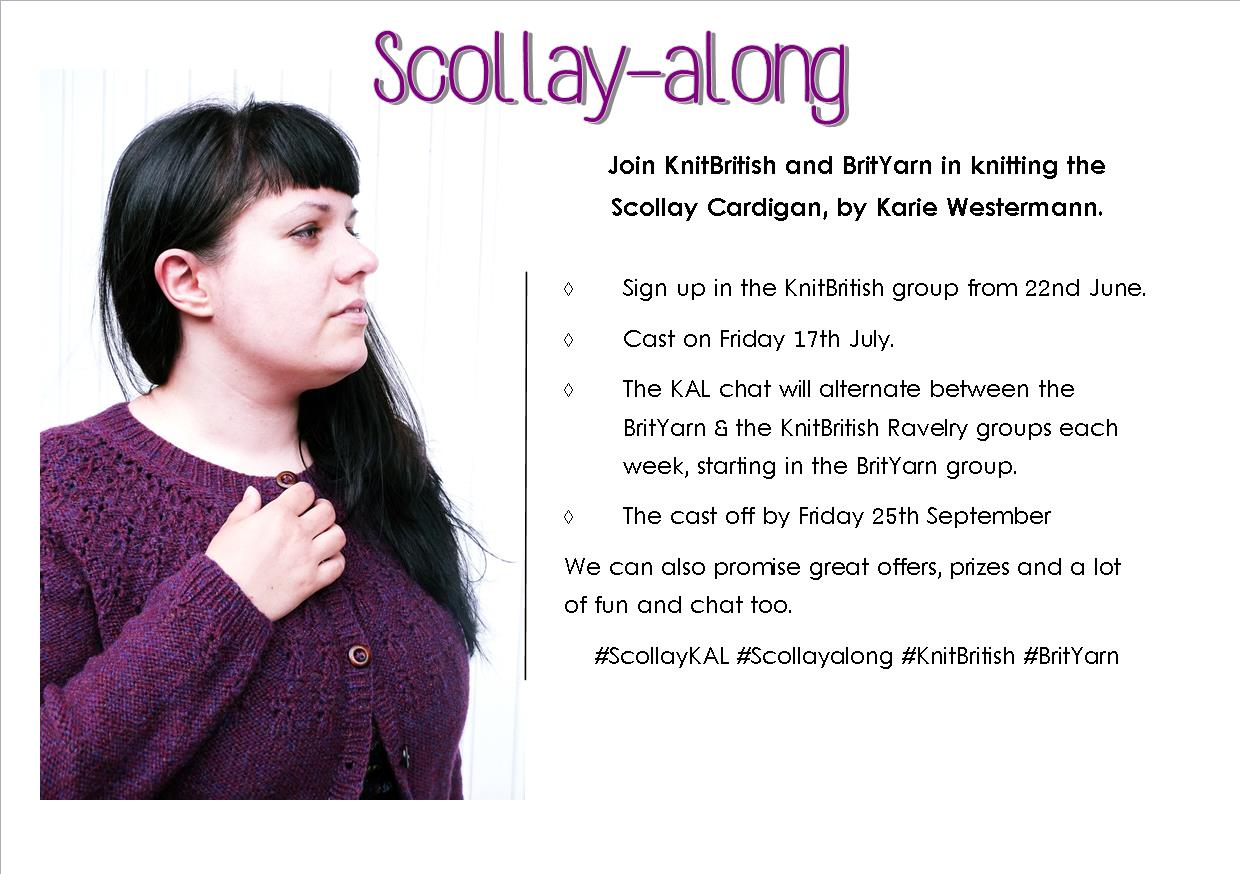
scollaykal2 The Scollay-along is having its Cast-On Party this Friday, July 17. It is not too late to sign up in the Ravelry thread - people have been swatching, discussing yarn choices, and pondering buttons. I have also had a few questions about which size to choose, so I thought I'd write a few words about fit, measurements, and how to think about sizing.

First a little story.

Once upon a time I worked for a yarn company helping people figuring out sizing and fit. One thing happened again and again: people saw a super-slouchy jumper, decided they wanted to knit it and then went up two sizes because they wanted a super-slouchy look. I always wanted to cry at this stage, because the slouchy look was built into the design. Part of being a designer is thinking about how we want things to fit and we do most of the work so you can just start knitting.

So, let's start by looking at the cardigan itself. I will share my fit consideration - then we'll discuss how you can make informed decisions based upon that!

July 2014 1058-horz

On the left, you see the cardigan on me; on the right, you see the Knit Now photo shoot of the same cardigan! Lyndsey and I are both wearing the 1X cardigan, but as you can see we look vastly different.

Scollay was designed to be a go-to cardigan with a few inches of ease. Ease means there is extra room to spare between the circumference of your bust and the circumference of your cardigan. Designers think about ease when we design - and you need to check how much ease is included in the garment when you are choosing your size and you also need to think about how you like to wear clothes.

Lyndsey wears Scollay with the ease I intended. It makes for a casual cardigan which will look fabulous over a t-shirt and a pair of jeans. It has a relaxed fit which makes it easy to wear.

Quick Recap: designers think about how we want our designs to look when we write the patterns. Scollay is designed to be worn with slight ease.

Although I am wearing the same cardigan, I am far more busty than the gorgeous model and so I am wearing Scollay with negative ease. Negative ease means that my bust circumference is larger than the circumference of the garment. I am wearing Scollay with roughly 1.5 inches of negative ease - but because knitted fabric has a lot of give, you are not seeing gaping buttonbands (unlike what you'd expect from woven material). The negative ease showcases the stitch pattern a bit more and I personally like the snuggly feeling I get with negative ease.

Be honest with yourself about how you like your Scollay cardigan to fit. How do you usually wear cardigans? Do you like a relaxed fit? Then pick the size that is closest to your normal size. Do you like how it fits me with zero-to-negative ease? Then pick a size down.

This is the really important bit: find out your measurements.

For some reason (i.e. society and arbitrary high street sizing) we tend to think ourself far bigger than we usually are. I know a lovely lady who's about a size L who knitted herself a size 3XL cardigan because she went with what she thought she saw in the mirror rather than her measurements. One of the things I really love about knitting is that it allows us to make clothes that fits us in shapes and colours that flatter us - so get a friend to help you measure yourself. Be honest with yourself and write the measurements down. Then compare your measurements with the ones given in the pattern (which includes ease, so choose your size with that in mind)

Customising Your Scollay Cardigan

I have really long arms and a short body - the sleeves fit me perfectly and the cardigan hits me just below the hips. You may want 3/4-length sleeves and a slightly shorter body that hits you just above the hips (or maybe you have a long torso and want your cardigan longer). Because all the stitch pattern work happens by the edges and the yoke, it is fairly straightforward to customise the length of the sleeves and the body. There is no recalculation of the lace pattern - you just need to work fewer/more inches in reverse stocking stitch before working increases/decreases.

Likewise you may find you have very generous hips, so cast on for a larger size and decrease down to a smaller size. Or you have very slender wrists, which means you start out with a much smaller size and work your way up to the right number of stitches. Or if you feel you want to include short rows for your bust, you'll be relieved to know you just need to work them in forgiving reverse stocking stitch.

There will be plenty of help, laughter, and chat in the KAL threads.

Thank you to Kate Heppell for kind permission to use the photo of Lyndsey in the cardigan. Photo by Dan Walmsley for Practical Publishing; hair & make-up Cassie Stewart; styling by Kate Heppell. My photo's taken by David Fraser. 

Making A Big Decision

bookprep Late last week I made a big decision. It had been brewing in my head for some time, but I finally said the words out loud: "I am going to make a book." I have no idea how exactly this is going to happen, but I am going to make a book.

This I do know:

  • the topic
  • the design vocabulary I am going to use
  • it's a book that will combine patterns and essays
  • my colour palette (yes, there's a secret moodboard)

I am also sure about these things:

  • the yarn support
  • the technical editor
  • the photographer(s)
  • the art direction
  • the sources I will use

I learned a lot from doing the Doggerland e-book which is why I know I will be doing things differently this time. Doggerland was so, so much work for me because I was learning on the job - and I was doing pretty much everything myself (with the admirable help of my partner). This time I want to delegate a bit more, so this book won't take me three years to complete. I also want to get some people on-board that are far better at certain things than I am.

  • book layout
  • distribution
  • random arse-kicking (because I designed over 25 pieces for the 8-piece Doggerland e-book thanks to useless bouts of perfectionism)

Now all that's left is to figure out how to make this work as I balance doing all this with my other work commitments. I have plans. Plans with action points.

Anyway, I have joined the 21st century and acquired a smartphone. I am now on Instagram if you fancy keeping up with my day-to-day existence - do say hello.

Tutorial: Lace Charts 4 - Chart Tricks & Knitting Hacks

I like my patterns to be inclusive, so I try to offer them with both written and charted instructions. However, sometimes (like the Mahy shawl) a chart is the best way of offering concise and precise information. I know many people don’t like charts, but I hope this series of tutorials will go some way to demystify charts and explain how to use them.  This instalment is all about my favourite lace chart hacks. I like to knit lace wherever I go (my favourite being pub knitting) and over the years I've picked some some tricks that I hope will come in useful. If this is the first post in the series, I suggest you go back and start with Tutorial 1, as I'll be discussing some of the things we've covered earlier.

Let's look at a shawl chart which has a repeat.

Shawl Repeat

By now this should not look too daunting. You have the row numbers, you know what comes after the centre stitch and this should knit up fine on first repeat, yes? But what if you have to work this chart 10 times? How would you feel about it then?

Problem 1: "I find working repeats really difficult. I never have the right number of stitches at the end of a row".

I hear you. Let's look at it closer.

Shawl Repeat_startfinish

Part of the problem is that you may think each square represents a stitch - so you should have three stitches left at the end of row 1. As we discussed previously, thinking of a square as a stitch is wrong. Remember: each square represents an action - in this case you are asked to work a yarn-over, an ssk and a yarn-over before you work the centre stitch. In fact, that means, you only have two stitches left over when you finish your repeat because you create yarn-overs out of thin air (so to speak) - the two stitches from which you make an ssk.

Solution 1a: look at the chart to see how many actual stitches you should be left with at the end of working all the pattern repeats.

Another possible explanation may be that you forget you are supposed to have edge stitches left at the end of the row. So, instead of having the supposed two stitches when you finish the chart, you may have four stitches.

Solution 1b: remember you have edge stitches left at the end of the row. Place stitch markers to indicate when you start/finish working the edge stitches. 

Problem 2: "I find working repeats really hard. I tend to get lost and never know where I am!"

Solution 2a: Stitch markers are your friends. Place them to outline each repeat. Sometimes you need to be careful as stitch markers may shift slightly (especially if repeats begin or end with yarn-overs). However, as long as you are vigilant, stitch markers are your best friends.

Solution 2b: Don't forget to count! Look at the chart - the repeat is worked over 10 stitches, so keep that number in your head as you work. Keep working in batches of 10 stitches, so you always start at the beginning of the repeat whenever you pick up your knitting.

Solution 2c: This is an extension of Solution 2b, but it's my favourite hack. Think of repeats as clusters of actions. You need to execute ten actions - that is one cluster. This is where lace knitting gets almost meditative: just work these ten actions over and over (or however many actions your chart calls for). Imagine if everything in life was as simple as working these ten actions over and over. Ah, sink into those clusters... you may even be able to break that 10-action cluster into even smaller clusters - on Row 7, for instance, you knit 3 stitches, work a yarn-over, then an sk2p, and a yarn-over, followed by four knit stitches. In my head I'd translate that into two clusters: "knit 7 cluster, work action cluster" - and I'd remember I'd need to end with two stitches at the end - at which point I'd do a yarn-over, an ssk, and a yarnover.

Now. There is something I hear again and again:

Problem 3: "When I use a chart, I get lost in the symbols and I lose my place immediately."

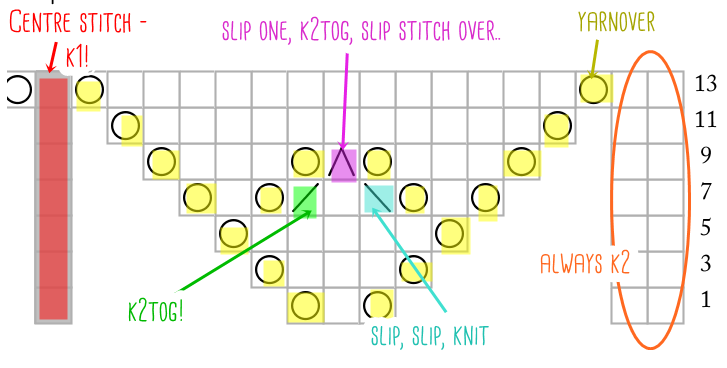
This is where stationery comes in handy. Allow me to demonstrate using a very familiar chart.
Basic Chart_no WS_highlighter

Solution 3a: grab your highlighters and assign a colour to each symbol (you may want to photocopy your chart if you are working from a book). Some people just find chart symbols really confusing and respond a lot better to colours. You'd be amazed what a difference it makes to some people - give it a go as you may be one!

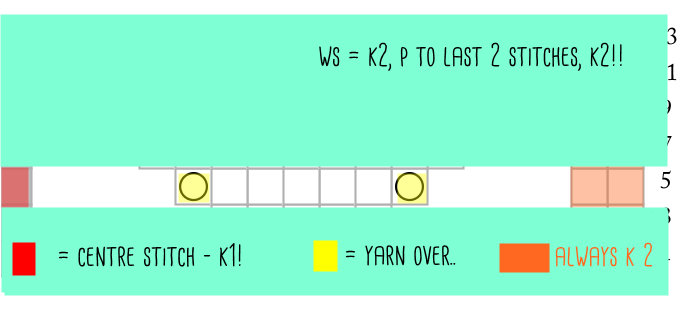
Solution 3b: Grab some big post-it notes. Place them above and below the row you are currently working on. Scribble extensive notes on the post-it notes. This filters out all unnecessary information and leaves you to focus.
Basic Chart_no WS_post_it

Solution 3c: And don't forget to tick off rows as you've worked them!

Problem 4: "I am afraid of making mistakes and then having to rip out my knitting because lace is really hard to pick back up!"

Don't worry, everybody makes mistakes. Fortunately fixing your knitting is much, much easier to do than you think. I like to think as lace knitting as almost-free therapy: I cannot fix everything in my life, but I can fix my knitting in a matter of minutes! Also, please don't think of mistakes as bad things - I love making mistakes because I know it makes me a better knitter!

Solution 4a: if you've missed a yarn-over in the row below, don't pull out the entire row. This is a great YT video by Paula of the Knitting Pipeline podcast that shows you how to fix it easily.

Solution 4b: Lifelines are great. Once you've finished a successful repeat of a chart (say, the set-up chart), insert a lifeline so you know you can rip back to this sweet spot where everything's right. If you make a mistakes the stitches will stop falling at this stage, you can pick up all the stitches and get back to knitting. You are working a particularly complex chart, you may want to insert a lifeline a bit more often - just make sure you know where you've inserted the lifeline and don't confuse yourself with having fifteen lifelines in one shawl. Keep it simple! This is a really useful YT video showing just how to insert a lifeline and how to use it.

One of the best hacks I know is to take some dental floss and insert it into the tiny hole on my interchangeable needle - that way I can insert a lifeline as I am knitting. This is particularly useful if there's a RS row in the pattern where it's all knitting with no stitch pattern (like Row 9 of the Shawl Chart with Repeat I showed you earlier).

Problem 5: "Charts are really small and I have trouble telling the symbols apart. It takes all the fun out of knitting if I have to keep staring at tiny squares!"

I am a low-tech girl and yet I find modern technology really helps me out here.

Solution 5a: If you are knitting from a PDF, your device of choice can zoom in  and out. Consult your manual to see how it's done as it differs from device to device.

Solution 5b: if you are working from a printed book or magazine, you can enlarge the chart using a photo copier (many modern printers come with a scanner/copier that will let you do it from the comfort of your own home - otherwise you can do it at the library or ask at work if it's okay to enlarge a chart using the office equipment). By enlarging the chart you can also really go to town with highlighters and scribbled notes!

I hope you've enjoyed this four-part series of lace chart tutorials.

Lace Charts 1 – The Anatomy of a Lace Chart Lace Charts 2 – How to Read a Basic Chart Lace Charts 3 – How to Read a Shawl Chart Lace Charts 4 - Chart Tricks & Knitting Hacks

Thank you! Kx